/Orlo%202.0%20Logo.png?height=120&name=Orlo%202.0%20Logo.png)
Orlo’s Benchmarking allows you to compare your brands against competitors to understand how well you’re performing on Social Media. If you haven’t signed up for Competitor Analysis, chat with your CSM for more information.
In Orlo, a “Brand” is classed as a grouping of social media handles. A Brand can have up to 1 Twitter account, 1 Instagram account and 1 Facebook account associated with it.
Brands are separated into two groups:
“My Brands” - Brands that you own and control.
“Competitors” - Brands owned by other companies which you want to compare your brands against.
Permissions
In order to access Competitor Analysis, you will need the “ViewBenchmarking" permission to be enabled in Settings. This will also allow you to view the reports.
In order to create/edit brands and reports, you need to have the “Manage Benchmarking” permission enabled. You may need to ask your Orlo admin to do this for you if you don’t have access.
Setting up Brands and Competitors
Setting up Benchmarking is a simple three-step process.
Step 1 - Add your Brands
To add a brand, select + My Brand from the top of the Benchmarking screen.
This is where you add your brand's social accounts into a brand profile. This allows Orlo to directly compare the social activity of your brand versus that of your competitors.
Simply pop in the name of your brand and assign a colour. The colour you choose will represent this brand in the reports you create.

Then you need to plug in the social accounts you want to use to represent the brand.
Click the + sign next to the social network you want to add, search for the handle you want to add, then click the + sign next to the handle you wish to add.
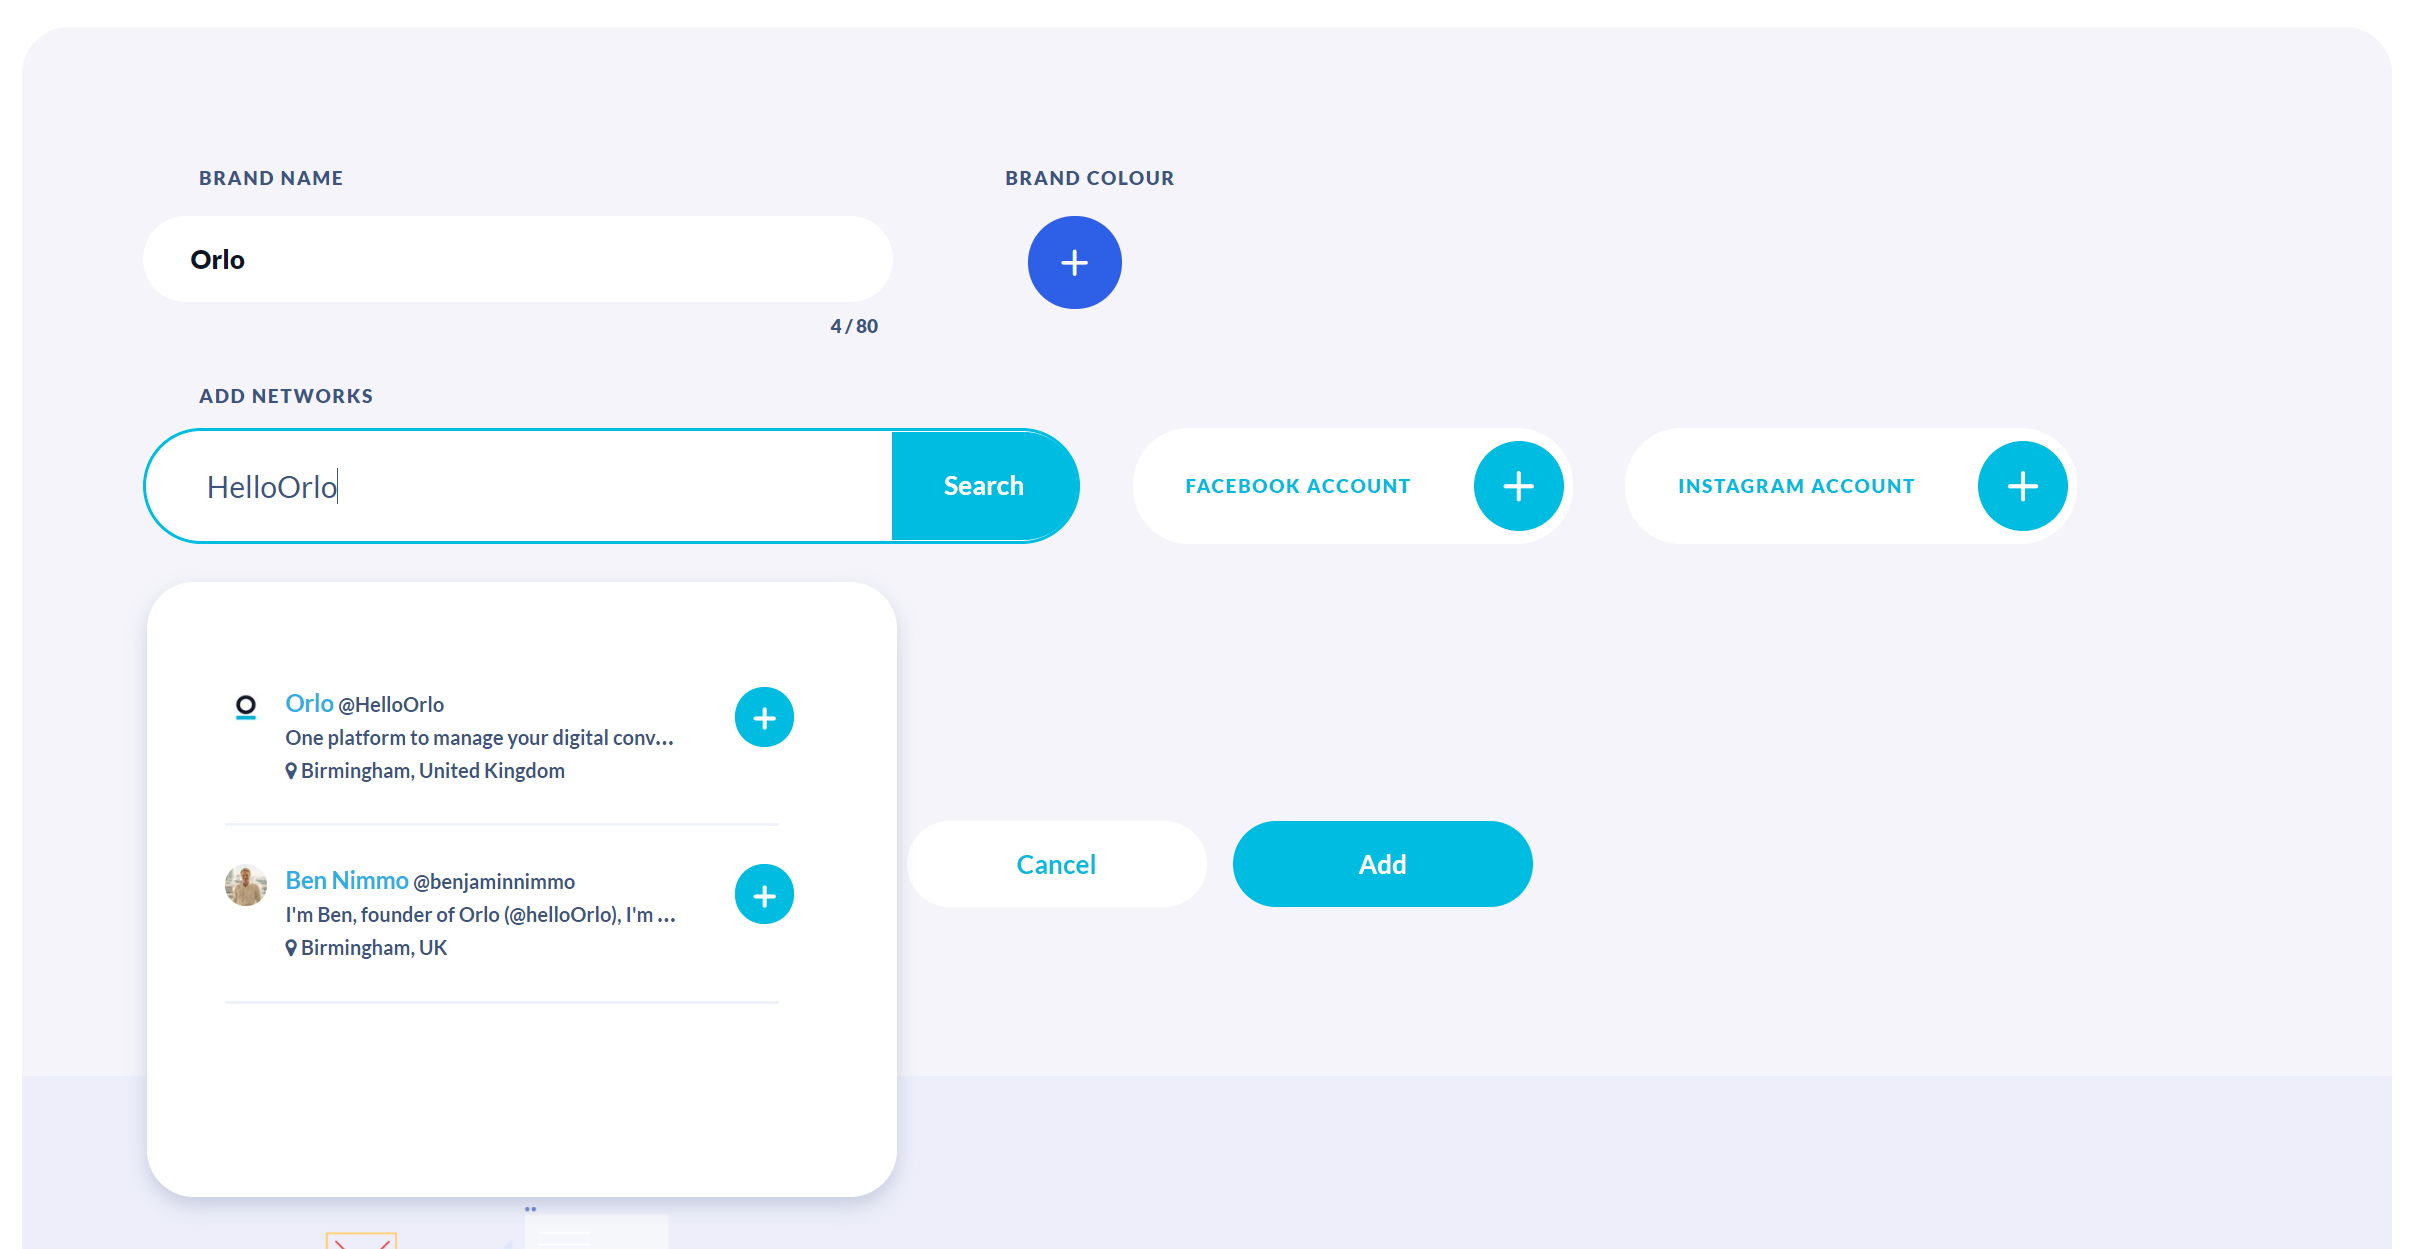
You will see when the account gets added to the brand listing like this:

Repeat this process for all the networks you wish to add, then click Add to save.
You can manage multiple brands by creating additional profiles.
Step 2 - Add your competitors
Now you need to add a competitor that you can compare your brand to in your report.
To do this, click on + Competitor - From here, the process is the same as adding your own brand above, but this time you are creating a profile for a competitor, so you will want to search for brands that represent the competitor you want to benchmark.
Step 3 - Create your report
Now all that’s left to do is to create your report.
From the Competitor Analysis homepage, select + New Report.
You will see this screen:
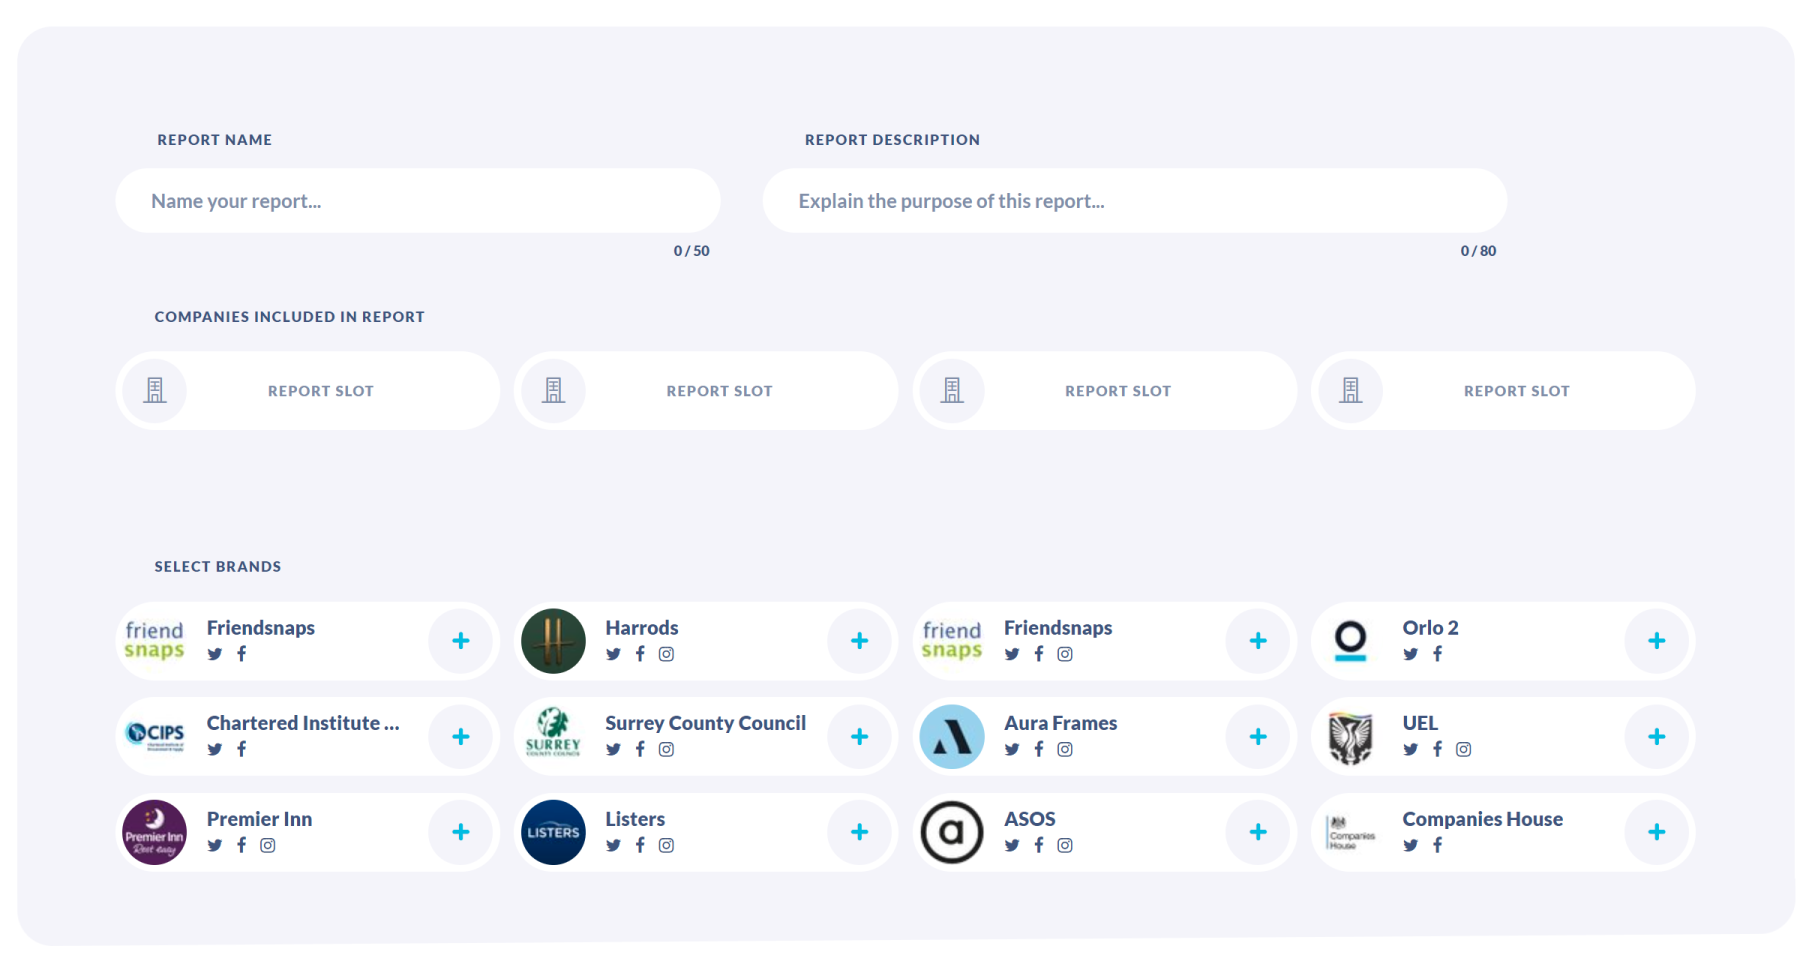
Give your report a name and a description, then select your brand and the competitors for the comparison and save. Simple!
The Report
Your report will be added to the list of reports you see when you first open Benchmarking. Click on it to view your report.
On the report screen you can:
- Filter the date range for the whole report by selecting a date at the top:

- Filter to just show data for Facebook, Instagram and Twitter in each section. In some sections, you can combine data from all networks.
- Visualize data in a simple graph so it’s easier to digest by clicking on average interactions, average posts per day, or interaction rate in the Report Overview.
NB: Please note, we will only start collecting data for a competitor from the point that you create them in Benchmarking. It can take up to 48 hours for all stats to show in the reports.
Manage your brands
You can add or remove brand listings from your account by going to Manage Companies.
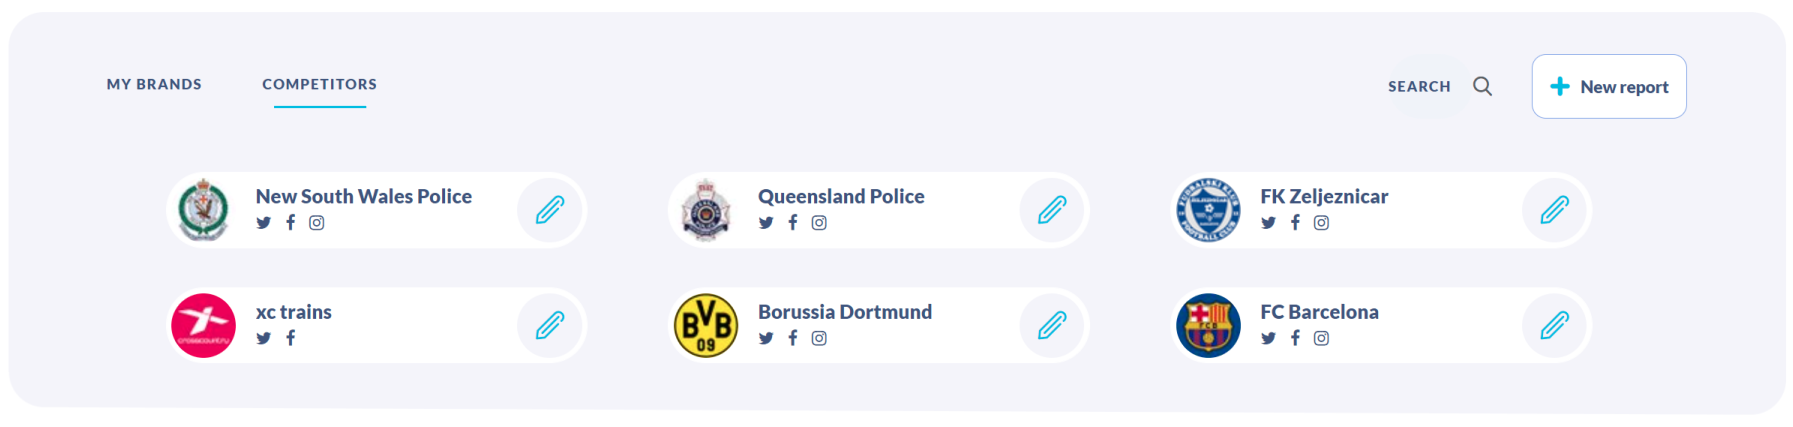
From this screen, you can click on the pen icon next to any brand or competitor to edit which social handles represent the brand.
You can swap between your brand and competitors using the tabs in the top left of the screen.
To delete a brand, simply hover over the brand icon, and click on the bin icon when it appears.