/Orlo%202.0%20Logo.png?height=120&name=Orlo%202.0%20Logo.png)
Ready to automate your Live Chat channel? This article covers the setup process, from creating the database of responses to be used, to customising and enabling a Chatbot on your Live Chat widget.
To create a chatbot for an existing Live Chat widget within Orlo, head over to the settings page and click the Chatbot button at the bottom:

On this page, the first thing you will need to create is a Metabase which the Chatbot will use. Metabases are the storage areas used to upload all the knowledge bases/topics required for the chatbot, so the bot will know how to respond to specific customer queries.
There are three ways to fill the Metabase you have created with data:

- Click Topics, then Create Topics to manually enter the information the bot will use in it's responses.
- Scrape an existing webpage/knowledge base, so Orlo can automatically pull in the different articles and translate them into Topics and Responses for the bot to use. Add the URL of your chosen webpage here and Orlo will trawl the page to automatically generate a summarised response. The response will be named using the web page title and the link will be the URL you add.
- Import a CSV file of Topics, Responses and Links to manually create the Metabase in bulk. You’ll need to have columns for ‘Name’, ‘Response’ and ‘Link’ to ensure the file can upload and the fields can be correctly matched.
Once your Metabase has been compiled, you will be able to see a list of responses similar to ours below:
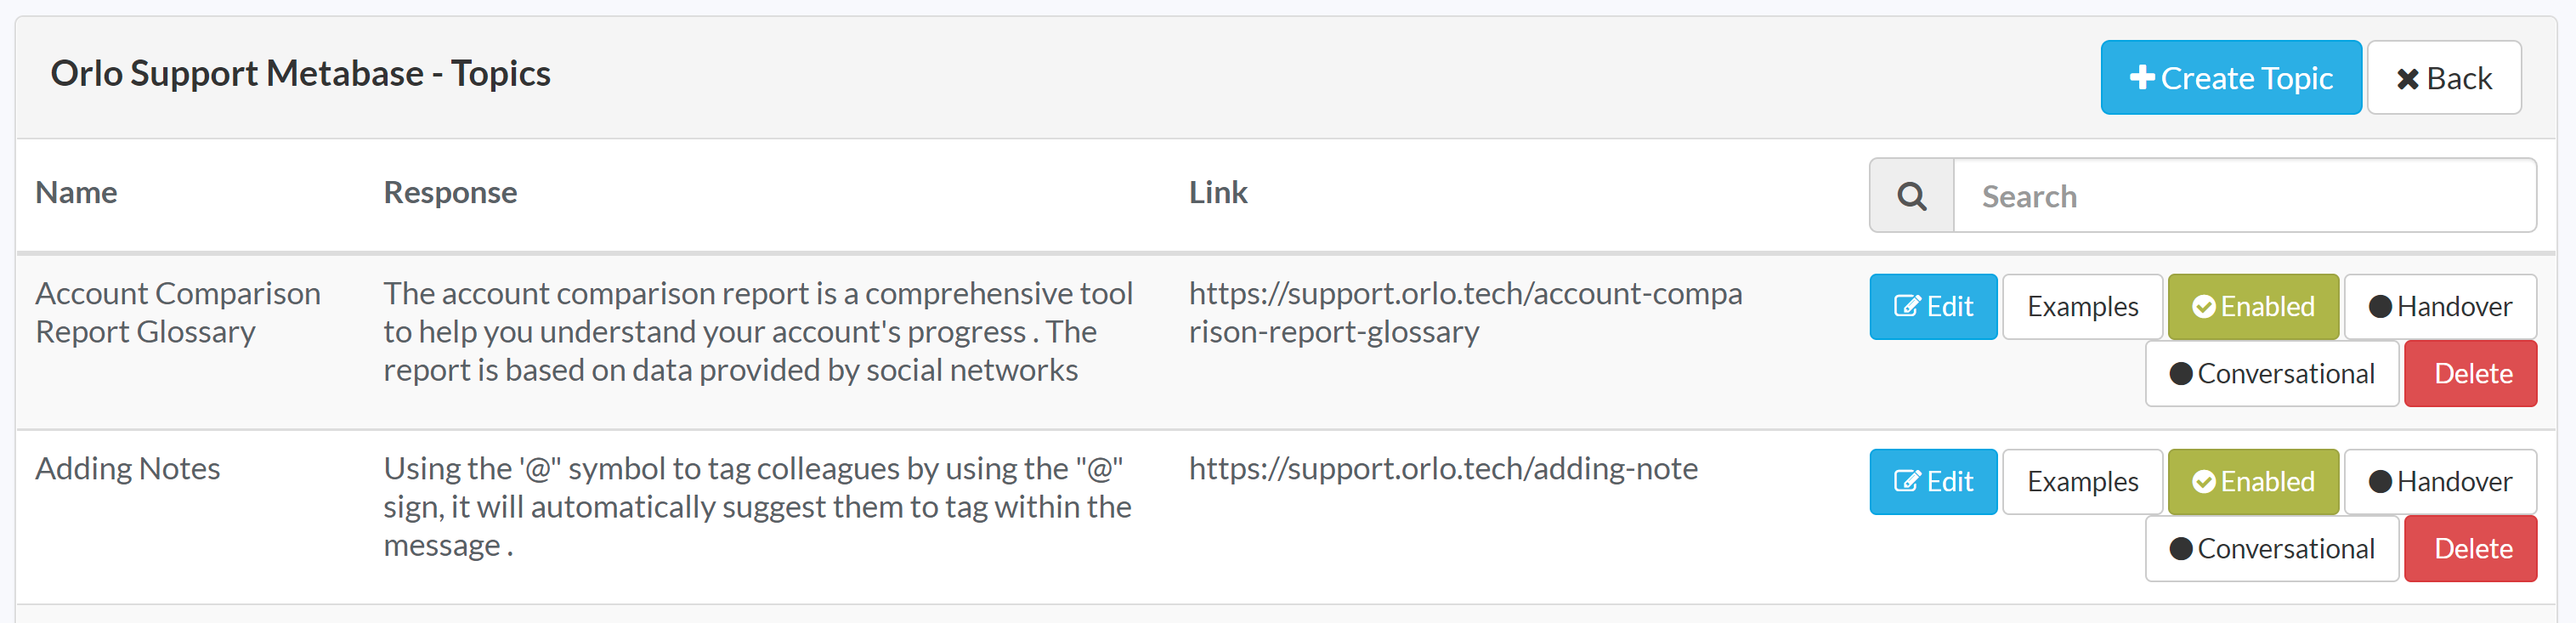
Here you can edit a Topic to change it's Name, Response or the Link shared, as well as provide the bot with specific examples of questions that may be asked by customers to give your Chat Bot an idea of what to expect from conversations and begin learning the ropes for how to respond.
You can also flag the Topic as a Handover one or a Conversational one. When Handover is turned on, the Chat Bot will ask the customer if they would like to talk to an agent about this Topic and when Conversational is turned on, the bot will not ask for feedback around a response and will wait for more input from the customer.
Once the Metabase has been created, head back to the main Chatbot settings page and click Create bot. Here you can name the bot, assign the required metabase for it to use and customise the responses that it will send to customers:

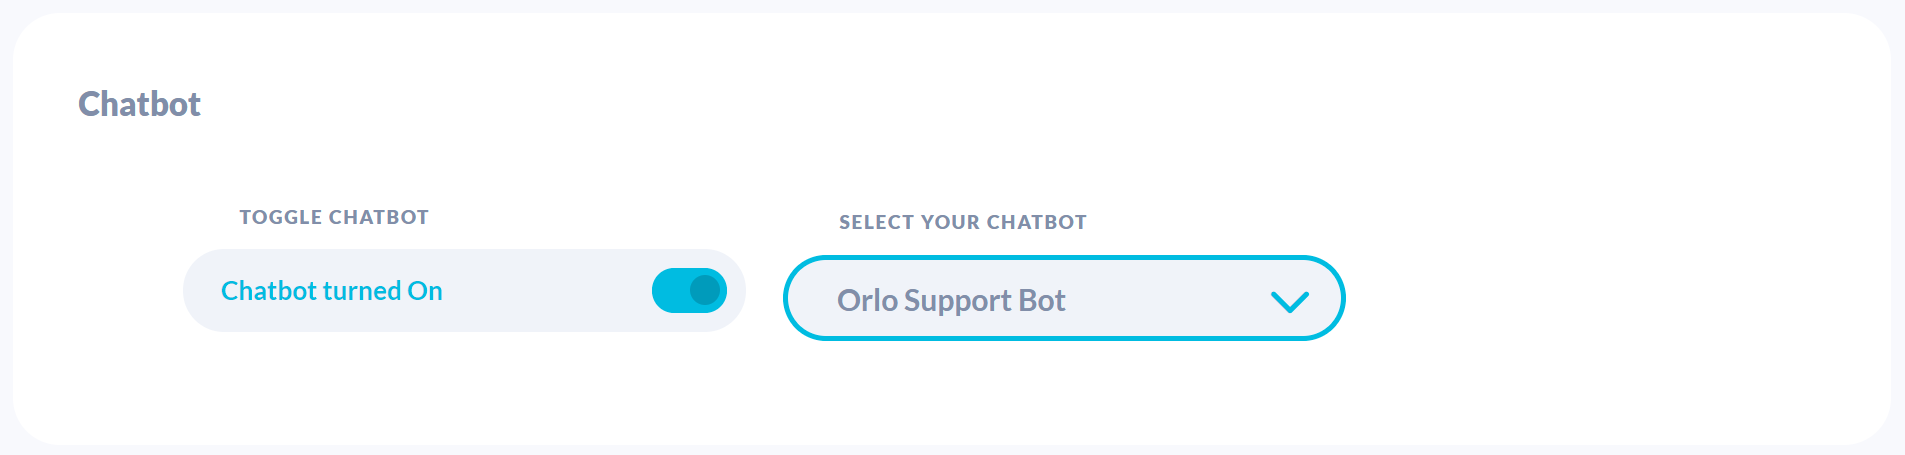
That's it! Now that you've made your Chatbot, the last thing to do is turn in on - Head to the Manage Live Chat Widgets page in the Settings area:

Next, click Edit on the Widget that you would like the bot to run on and scroll down to the Chatbot section. Toggle the Chatbot to On and select the required bot from the dropdown menu. Once you're happy with your selection, scroll to the top of the page and click save and your Chatbot will now be live!
Welcome responses cannot be edited once they've been created. To do this, you will need to delete the old Chatbot and recreate a new welcome message, which will then need to be linked to your Metabase.